
This shot was created in Houdini 20.0 with native flip and whitewater tools. And the comp was done in Nuke.
I was responsible for all aspects except for the built-in flippy model.
I will try to breakdown this shot in detail in this post. If you have any question, feel free to reach out, you can find my contact info in my profile.
*If you don't see the videos below playing, please check the autoplay settings on your browser.
Preparation and Low-Res Sim
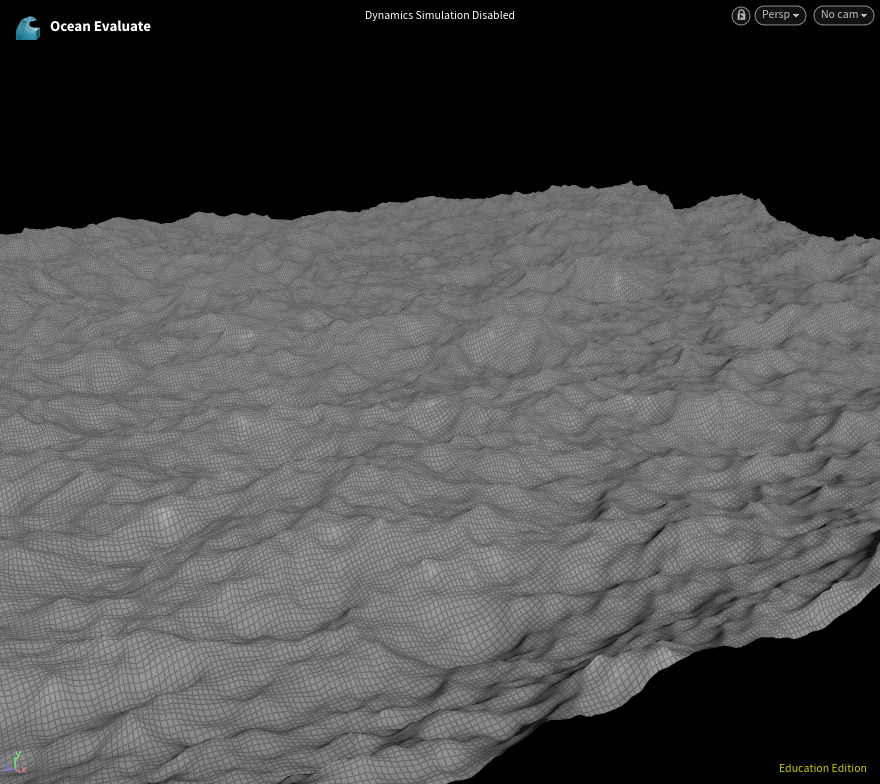
There are several layers that go into creating a stormy ocean. I started with bigger waves and then moved to smaller details. I used a combination of 2 ocean spectrum. It's just a matter of playing with the settings and noising them up. And I saved the spectrum out as houdini geo so in the future I can use them to displace my flip sim in the future.
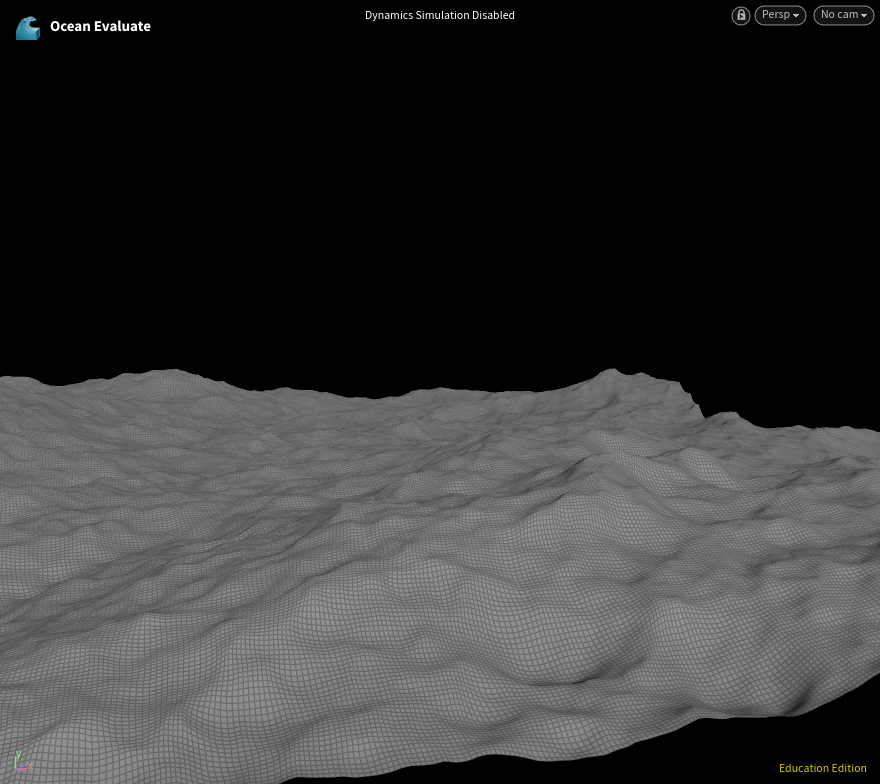

Moving on to flip sim. I used the shelf tool to create the wave tank. It contained another ocean spectrum that had nothing to do with the big wave. So I was only using it for detailed flip advection. Still I needed to match the wind direction and stuff but other settings I focused on crips movement.
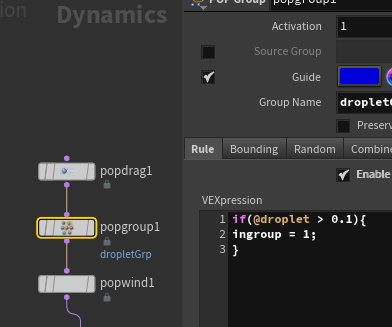
If the Flip nodes are created from the shelf tool, the parameters in Flip dop will be all properly linked up, All I need to do is to prepare some extra forces. All I did are to add some air resistance, to group the droplets, and to use some wind to affect it.
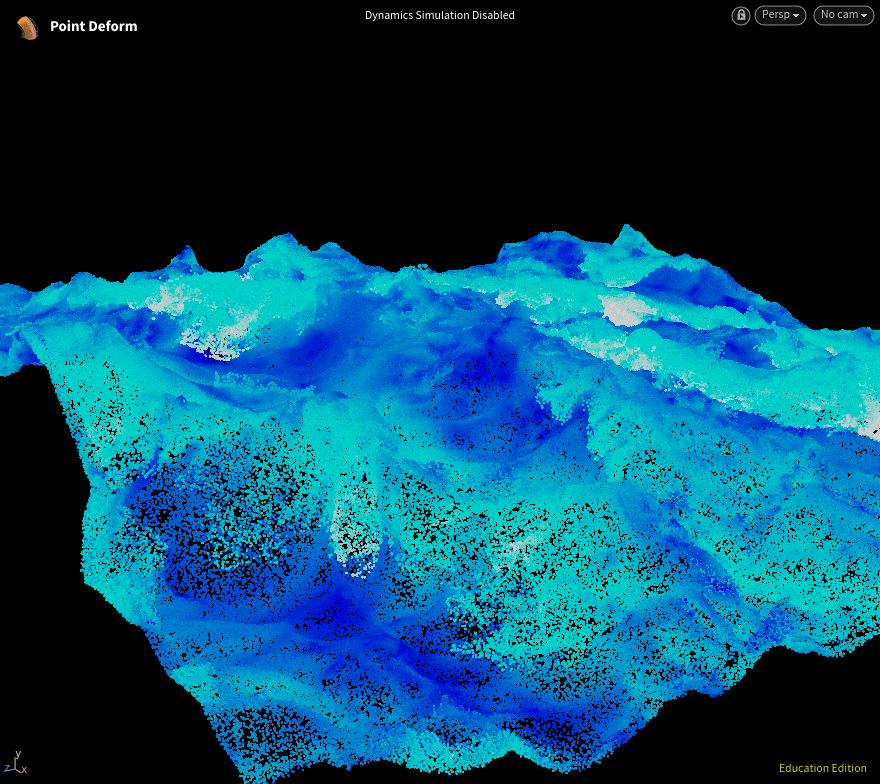
For the first simulation, I went quite low-res. It's only for previewing how the particles are moving. And it's faster to iterate versions. When that's done, I can now bring in the big wave grid to point deform the flat tank particles.

With this, I can bring in the collision geometries to animate to collide/follow the wave movement. I have 2 flippies to animate, one is kinda surfing and the other is just falling from the sky. I added a pyro burst source and rasterized it at where the flippy is crushing into the ocean, so I could use it to advect some extra splashes in my hi-res sim.

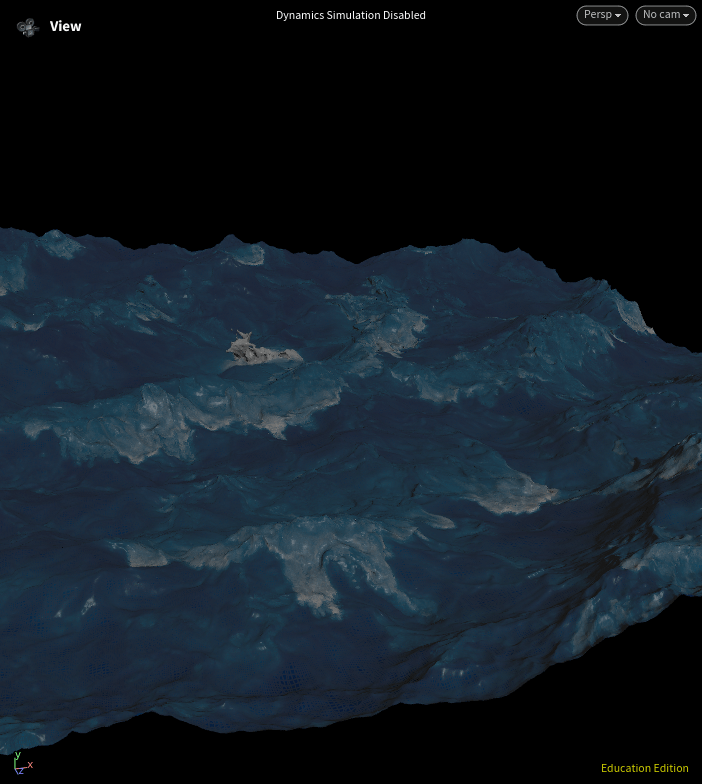
Hi-Res Sim and Meshing
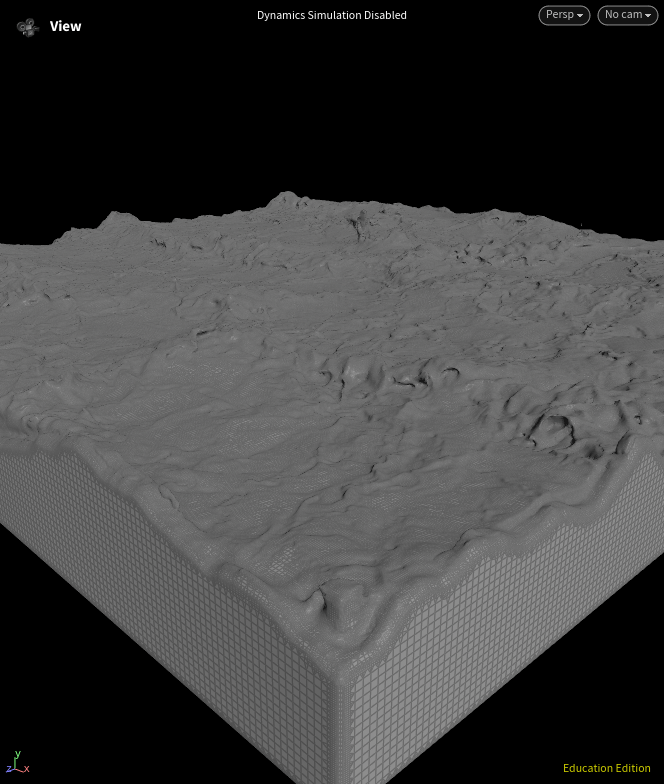
When the collisions are ready, I moved to hi-res simulation. It really took a long time and a lot of disk space to complete, so it's quite important to stay at low-res to refine the shapes. And then I moved to meshing. I set the pscale based on velocity and vorticity.

And then I generate hi-res vdb with particles, and did a sdf union with the low-res vdb from fluid compress surface.
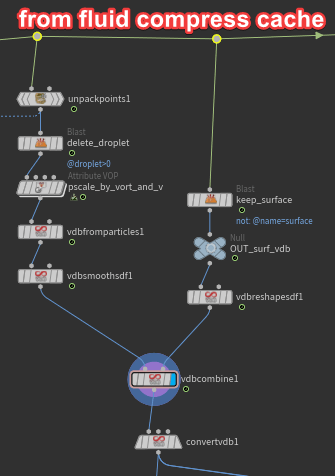
And then I deleted the boundary part and only kept the surface of the mesh. After that I transferred the velocity and vorticity back to the surface mesh.
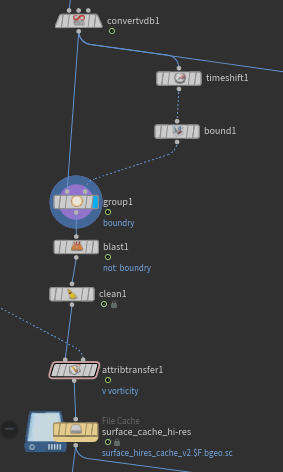
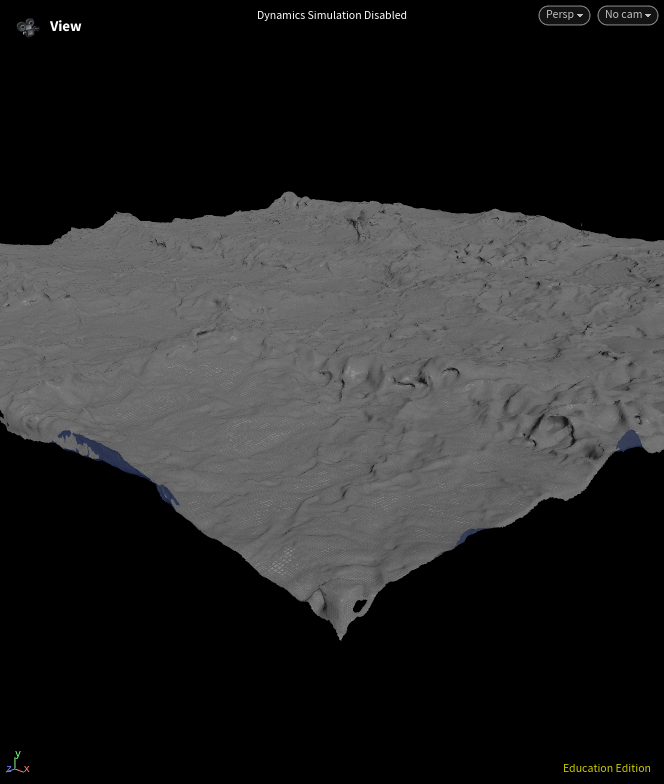
And then I use flatten edge of the mesh so that I can use the spectrum file to distort it instead of using the actual flip sim. Because by doing this, I can match different area perfectly without obvious border. Everything will match the spectrum shape.
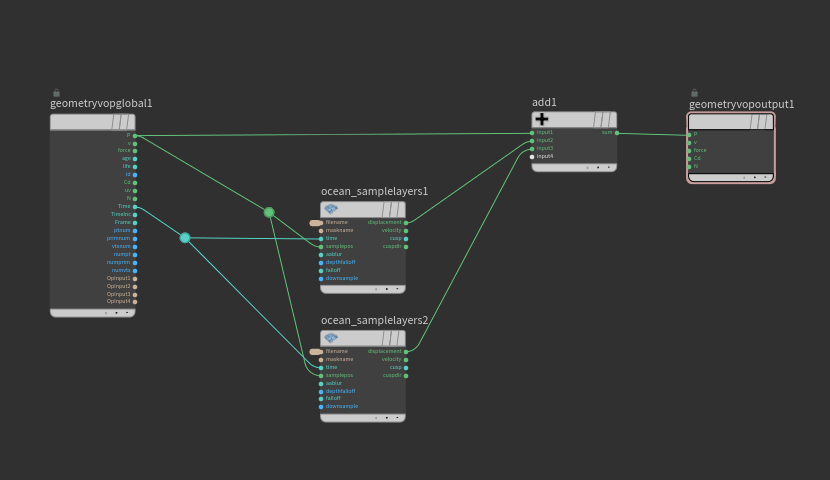
I can use the ocean sample layers node in vop to distort the edge position (which is flatten from the flip mesh) with the initial tank spectrum (crips wave shapes).

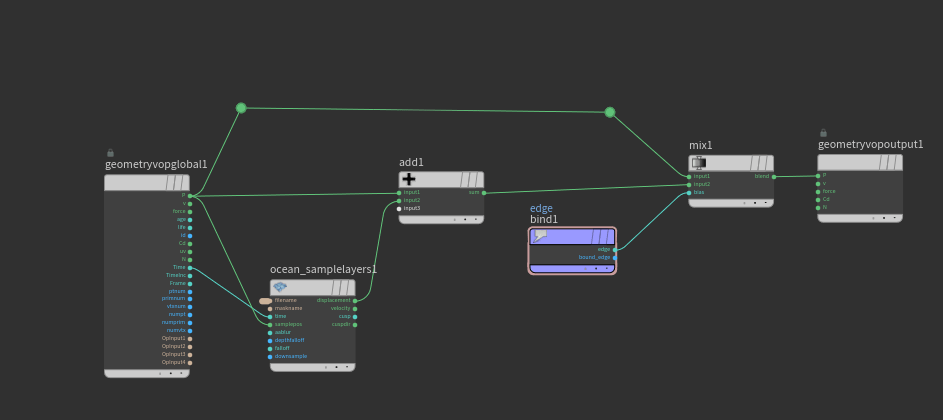
And then used a similar set up to distort the whole ocean with big waves spectrum.(big movement shapes)
And use some fit range we can color the mesh with velocity and vorticity.
Meshing also takes quite a long time so it's better to do a file cache for it.
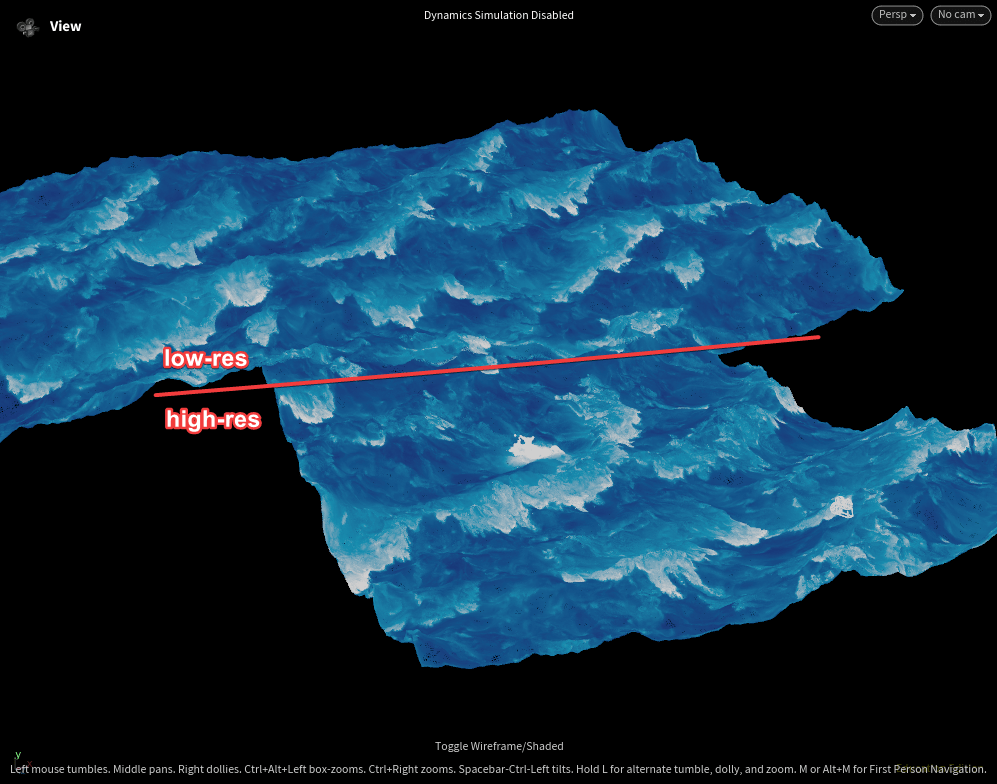
And then I copied the whole setup just with a lower resolution settings to do another simulation and meshing at mid ground position. With the spectrum distortion matching perfectly, it's really a nice transition and from the camera position it's not possible to tell.
White Water Simulation
I brought it the fluid compress cache and used it to generate white water source. It's quite some heavy process so it's better to cache it.

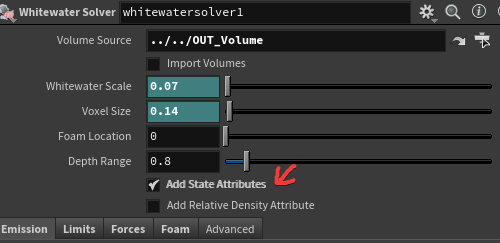
But the simulation itself isn't too complicated, I just add some pop wind to affect the spary particles. Never forget to turn on the state attributes for spray, bubble, and foam separation.
Because I don't have a powerful computer, I splitted the simulation into 3 parts and just altered the seed and then combine them together for a denser foam look. But it's just way too disk heavy to store all the data, so I have to compromise on the front close up density.
I used the same nodes from flip meshing to distort the white water particles with spectrum so they match the waves.
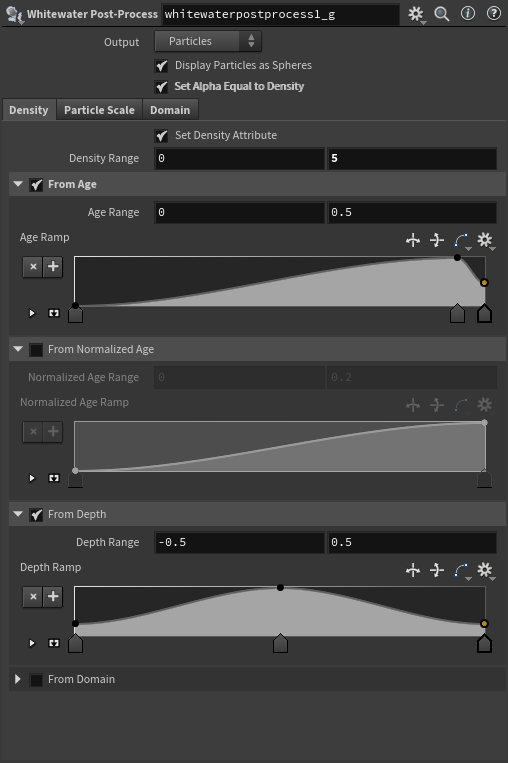
And then I plugged in the newest white water post process node from Houdini 20 to setup density, and pscale from the age and life attributes.
I feel like white water is quite forgiving and there's a lot of freedom in doing it. It really came down to which part I want to enhance. So I added some more on where the flippies are interacting with the water. And because it's just points rendered as volume, I can use simple pop sim or regular flip sim also depending on what effects I'm looking for.
Background Ocean
The far background ocean was just a grid with displacement. But it's a bit unusual for my case. Normally if using a heightfield to generate the ocean geo, I can displace the grid in render. But since I was using the spectrum, I have to subdivide the grid in sop context and then deform it in the same way as the flip and white water.
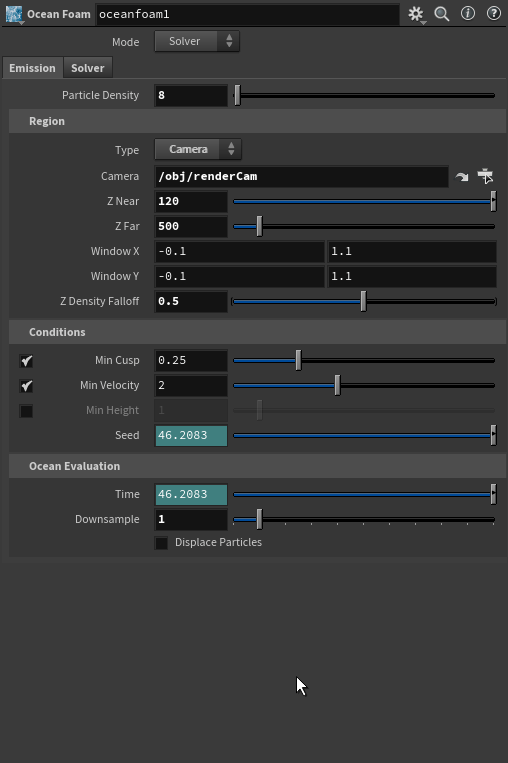
And I used a ocean foam node to generate some simple whitewater effect, for very far background, it's good enough.
Rendering in Solaris
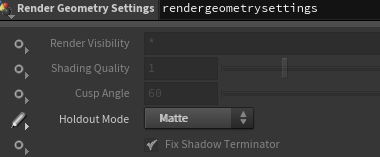
To better manage it, I split the renders into different parts, the first part is the geometry, I set all the white water to indirect only, or phantom in render geometry settings. So I can only have the geo but the white water shadow will still affect the look. It's probably pretty minor and doesn't have to be set up like this tho.

And then I rendered the main white water with geometry as holdout matte.
And then I rendered out the smoke and the extra splashes with the similar settings.
Compositing is quite straight forward and easy, just put the elements together and we have it.
Final Result
Thanks for reading the breakdown blog. If you have any question or suggestion, please let me know. And if you find this helpful or interesting, please consider checking out my other breakdown, you can find them on my profile. Cheers.