
This shot was rendered with Unreal Engine Lumen. The character was modeled in Maya. The textures was created in Substance Painter and the particles were simulated Houdini with volume advections. Color grading was done in Nuke and Davinci Resolve.
I was responsible for all aspects except for character animation and the environment, which were from Mixamo and Quixel mega scan library respectively.
I will try to breakdown this shot in detail in this post. If you have any question, feel free to reach out, you can find my contact info in my profile.
*If you don't see the videos below playing, please check the autoplay settings on your browser.
Character Modeling and Animation
This project started as a character modeling session. It was mainly modeled in Maya. At some point I used blender sculpt tool to alter the face shape a little bit. But it was low poly the whole time and never went into zbrush for a proper sculpt.
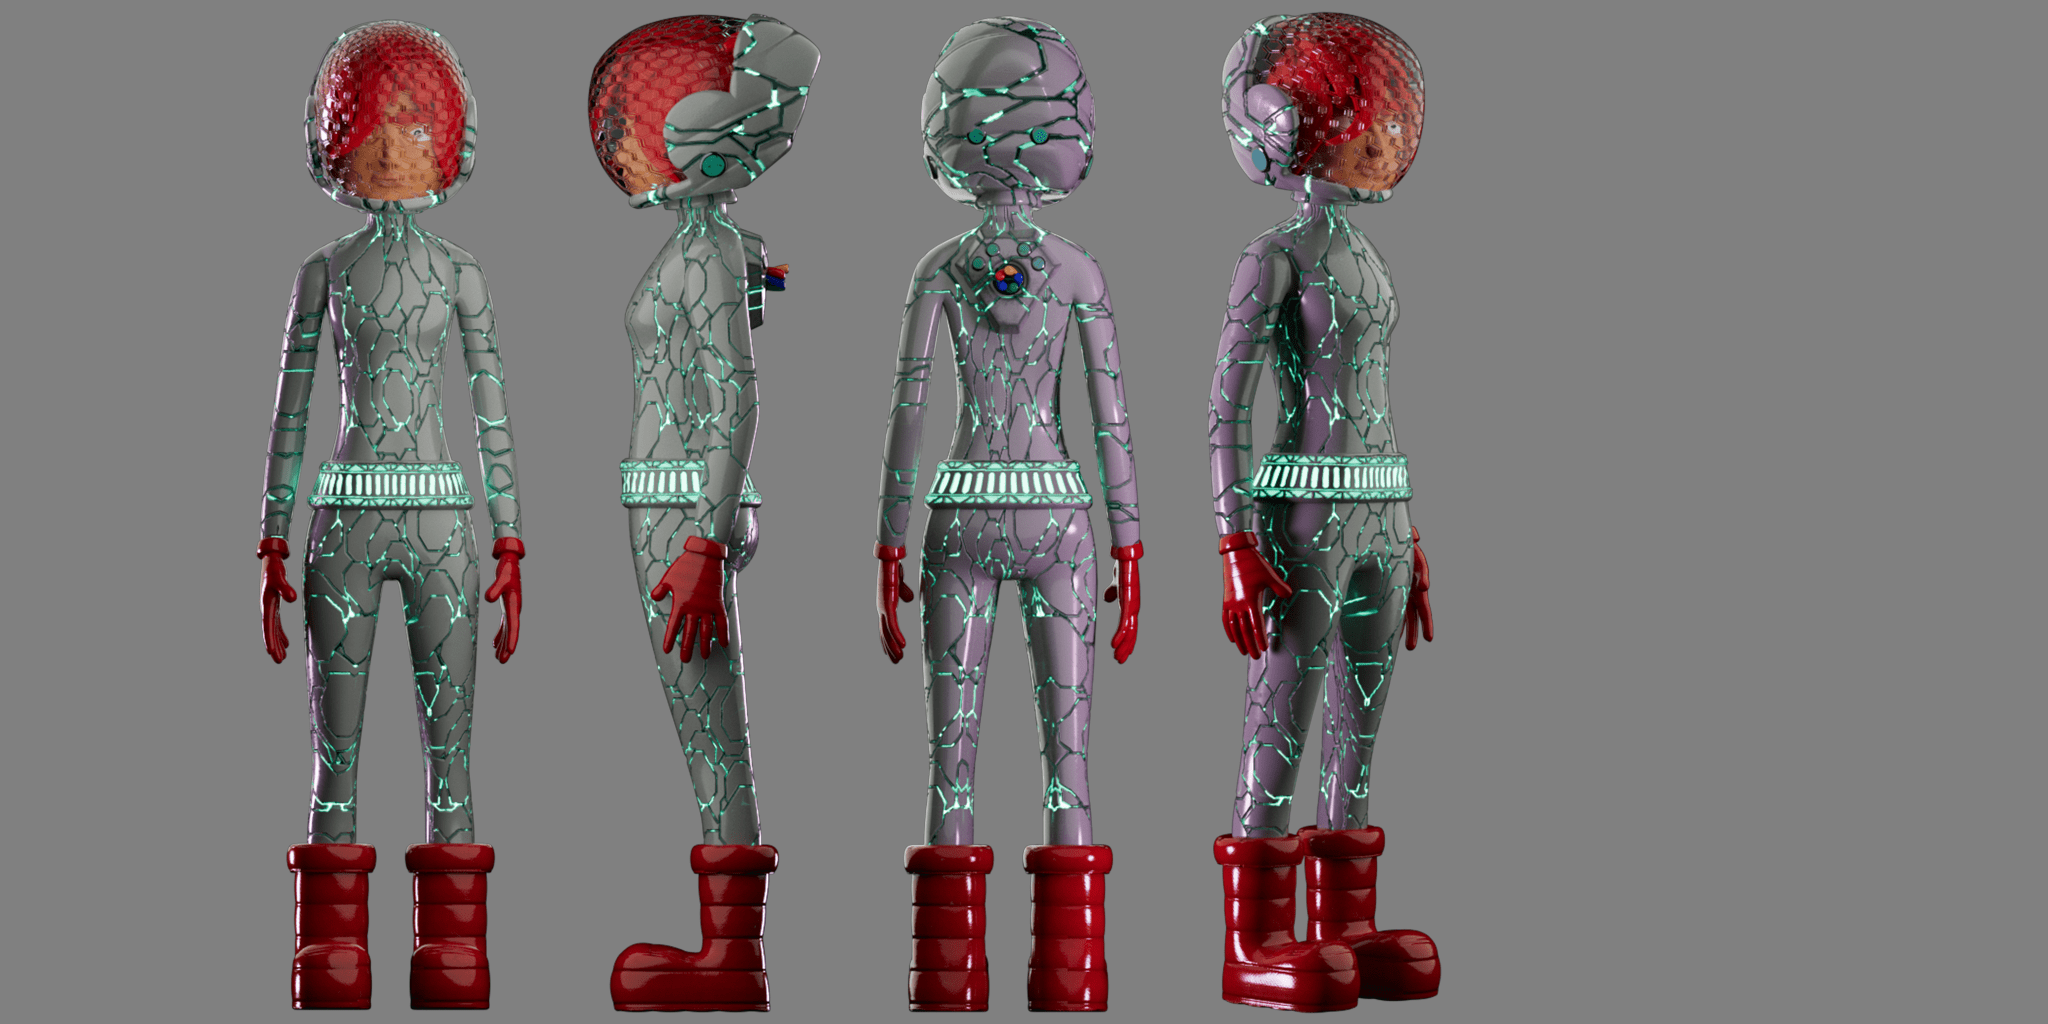
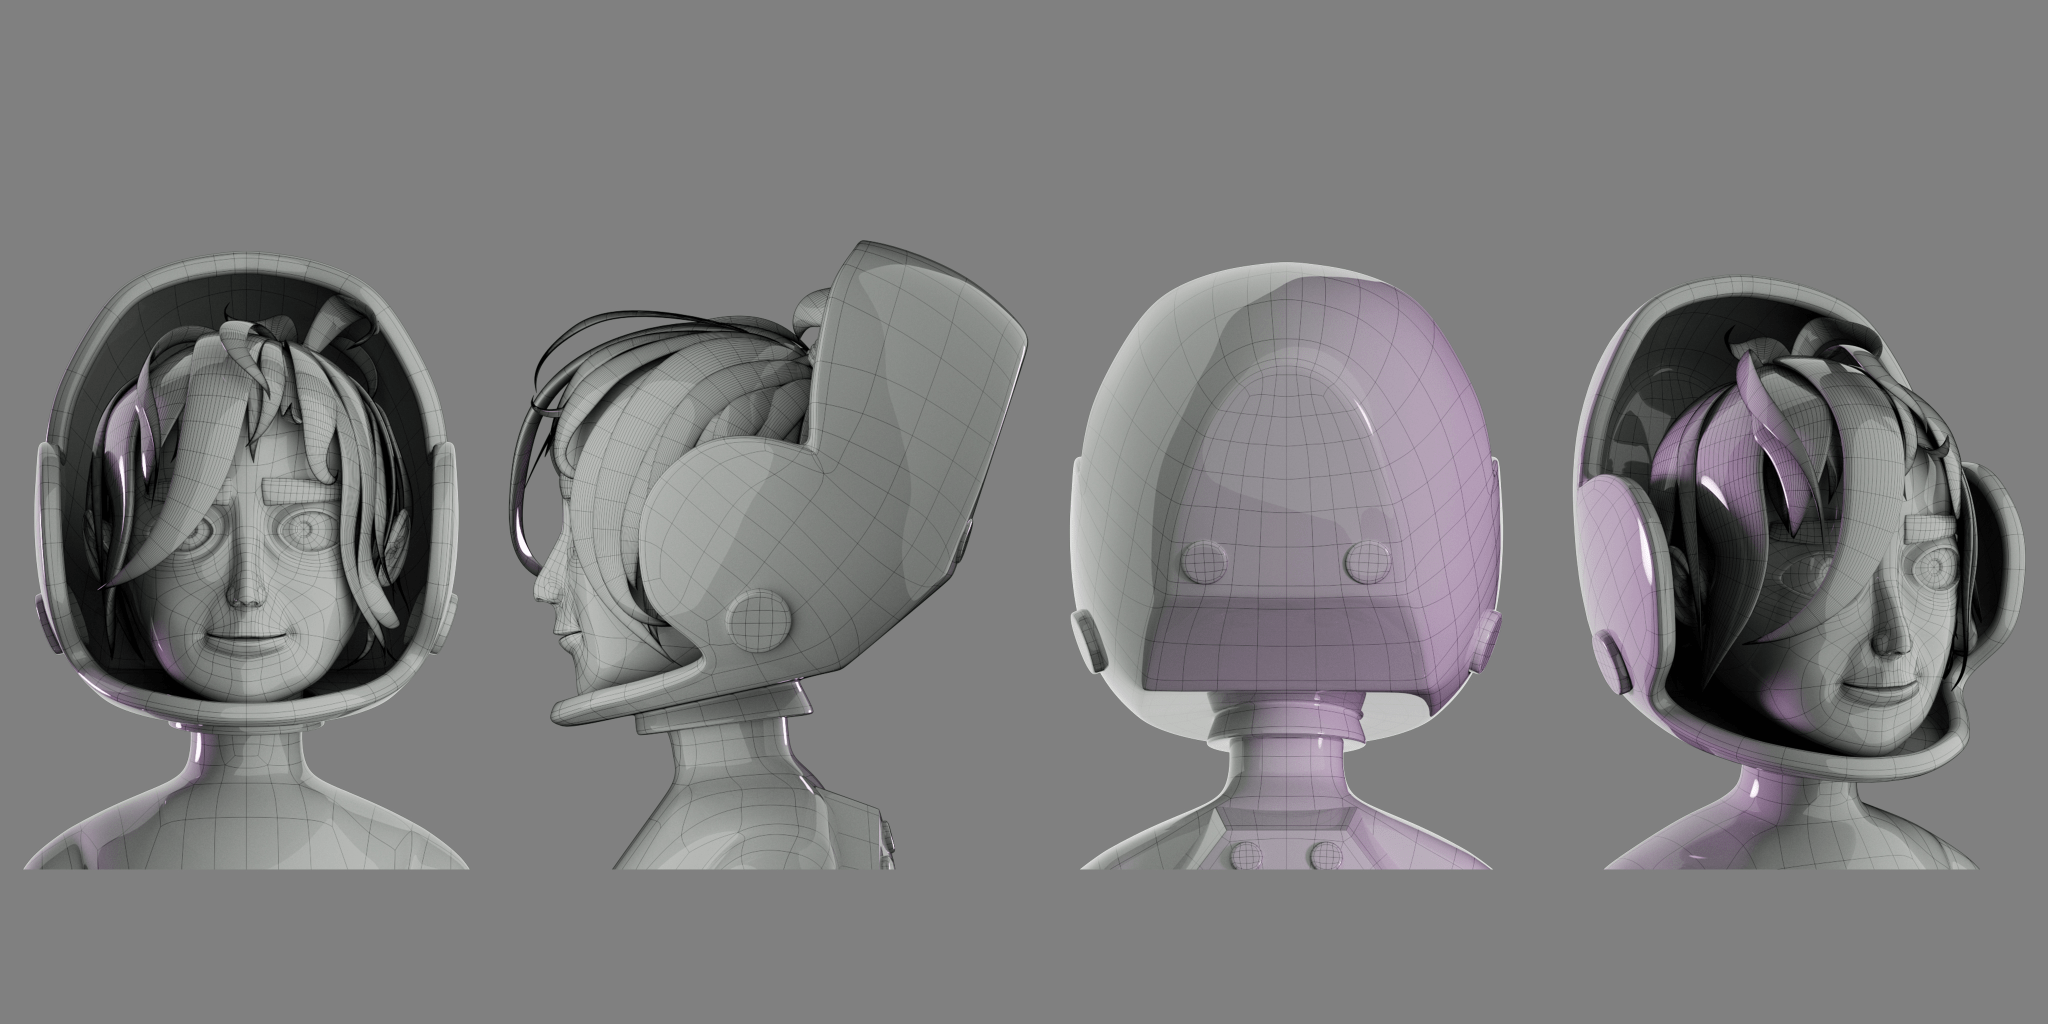
The textures were created in Substance Painter, I had 2 udim tiles for this character. After the character was done, I uploaded it to Mixamo for rigging and animation. The result was pretty good considering how easily and fast it could be done.
Unreal Engine Scene
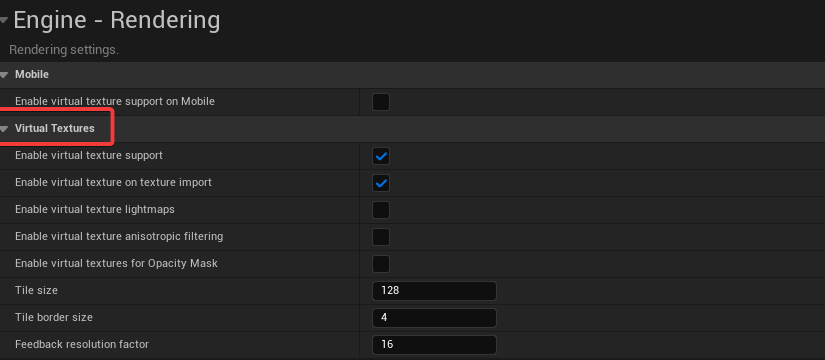
Then I imported the fbx file into Unreal Engine. Before importing the character, I needed to enable virtual textures in project settings for unreal to read udim textures properly. This requires a restart of the engine and takes quite some time, so it's better done earlier than later.
And I created some default lights with environment light mixer, but this scene was mostly interior so it was more for visualization than actually lighting the shot.
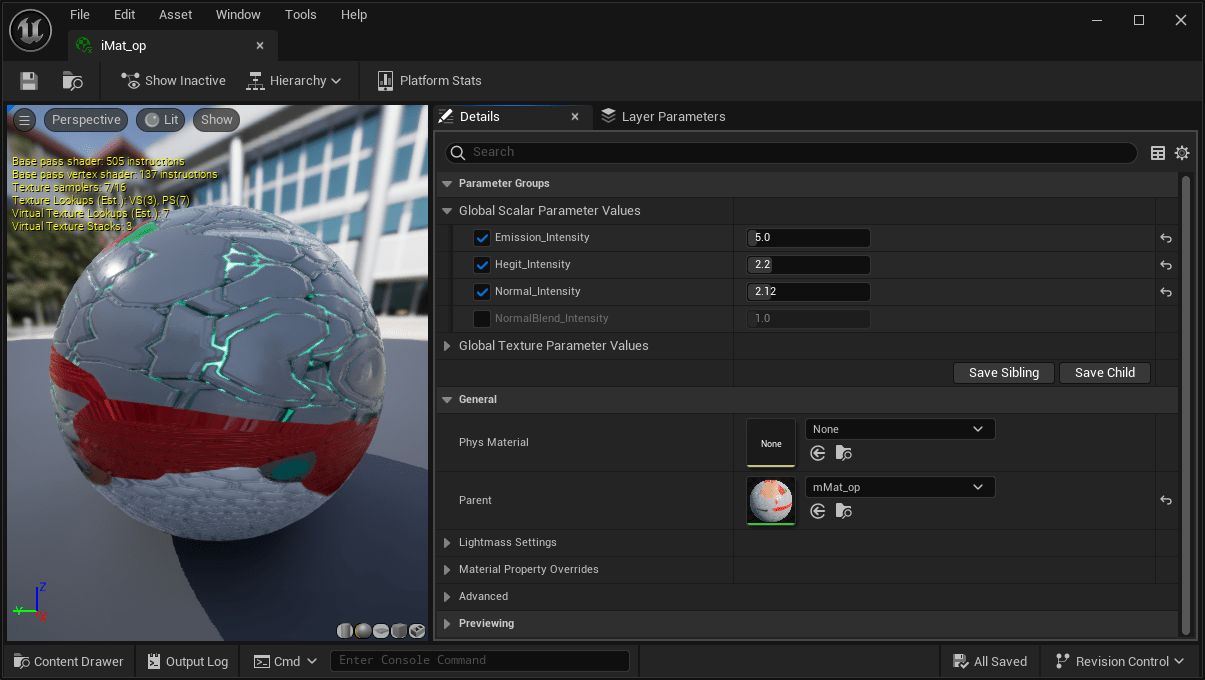
And I import my character rig and animation; created a level to put it in; then created a material for it. I used a blend angle node to combine my normal maps and height maps together, but this step was probably not necessary.

And then exposed some parameters to the material instance and assigned the instance to the character. It was much faster than adjusting the actual material in Unreal.
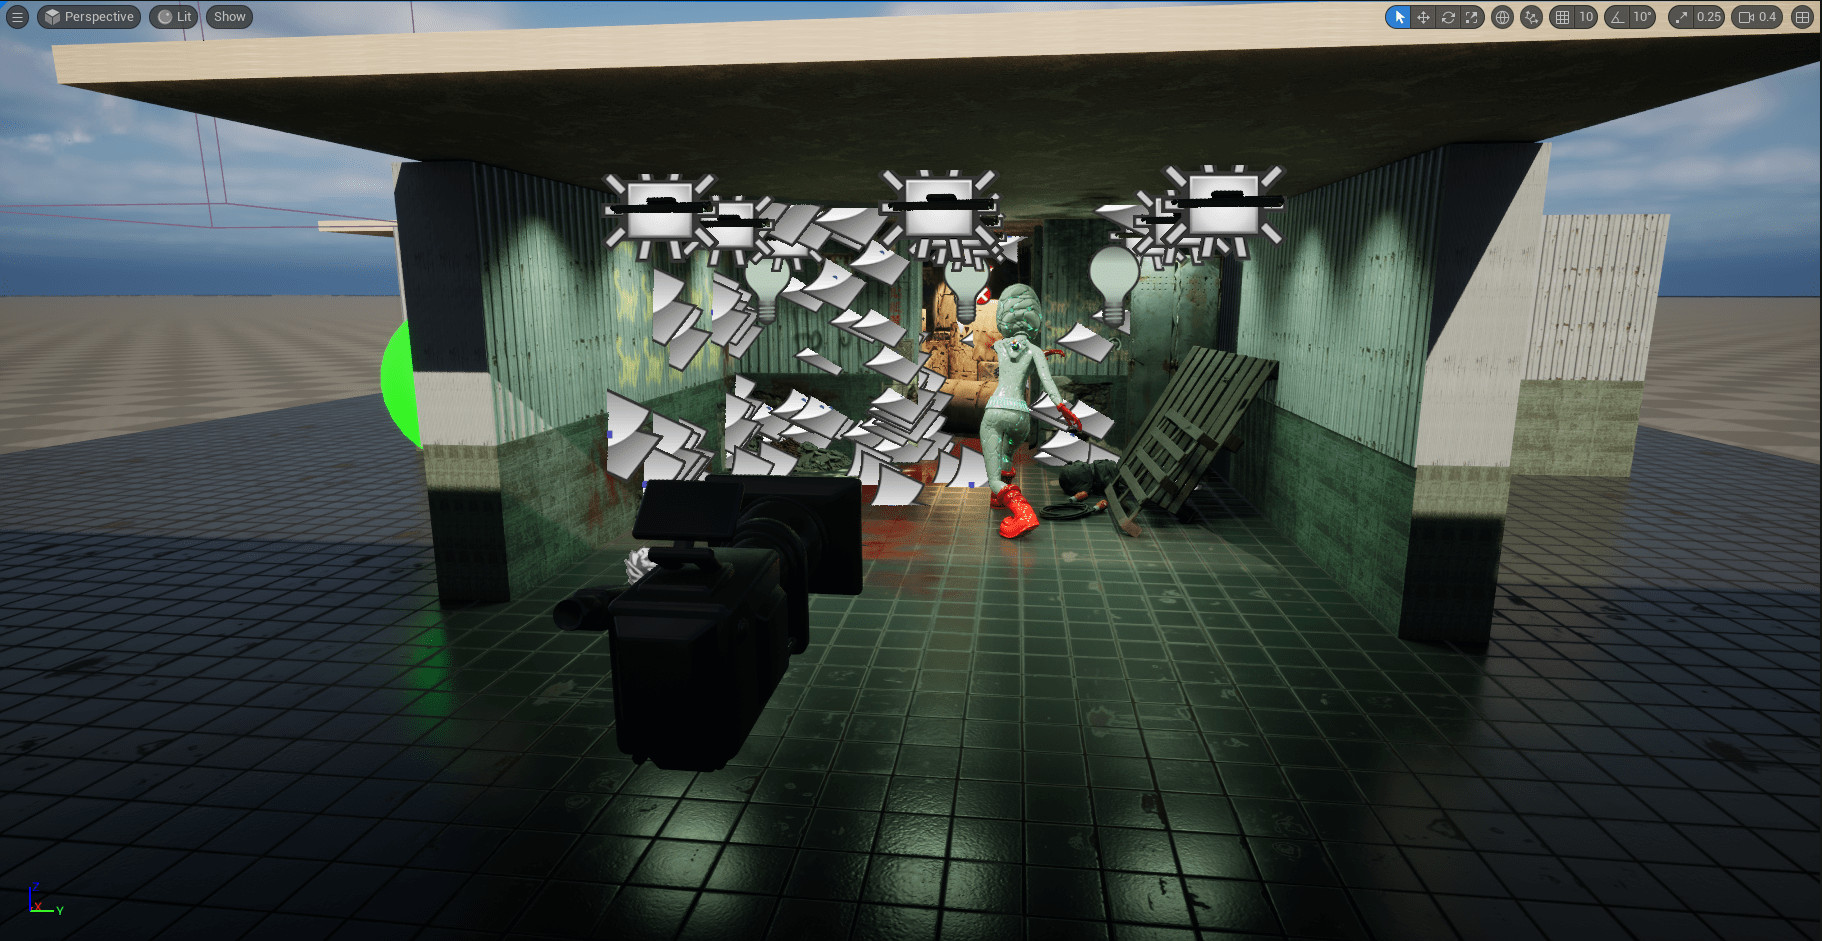
I used the some basic primitives with mega scan materials to create the walls. And then I populated the room with lots of decals and mega scan models. And in no time I had a scene.
Before setting up lightings, I created a post process volume to disable auto exposure.

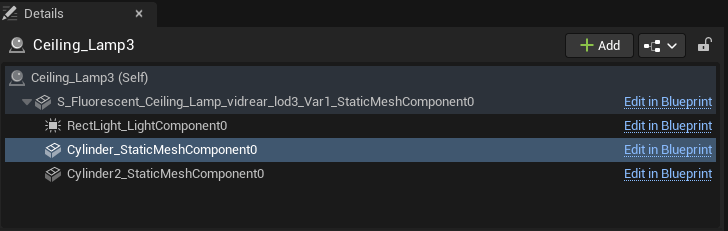
Lighting was very similar to other 3D packages. I used some rect-lights and point lights; parented under light models( and created some custom actors) so they were naturally motivated.
After the lighting was done. I created a level sequencer and set the duration to match the animation. I dragged all the actors that I wanted to animate into the sequencer. I animated some lights flickering; the door swing and the camera movement to enhance the kick.
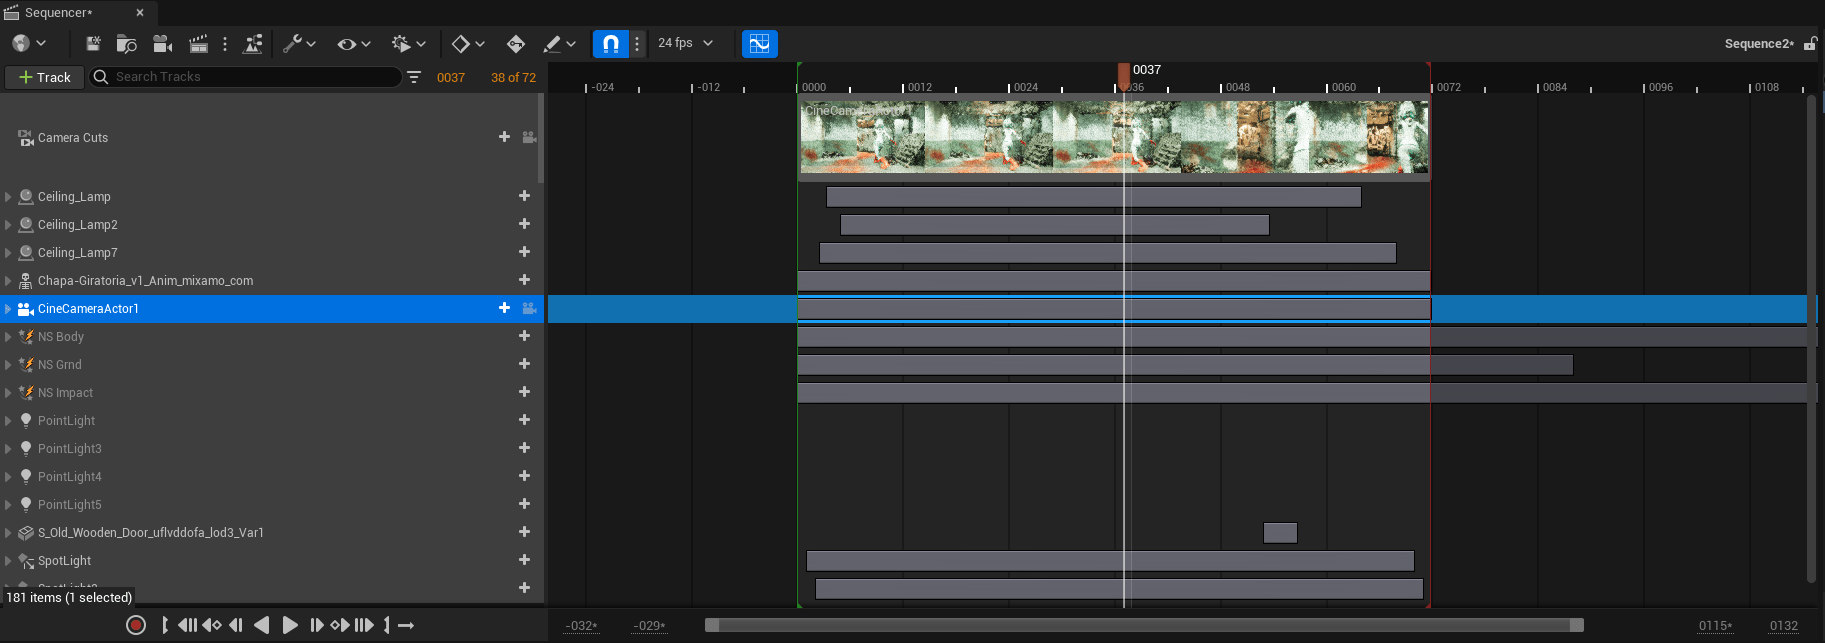
I will come back to rendering in movie render queue later. But with this workflow, I can create multiple shots with different modes really quickly.
Houdini Effects
Preparation
Now I have to jump back into Houdini to create some particle effects. I first exported an alembic cache from maya for the character animation and imported into Houdini.
I wanted to advect the particles from smoke, so I created 3 smoke simulations first with Axiom solver for 3 particle effects.
For the emitter from character body, I used a pyro source spread to create density and temperature growth. And the ground and impact emitters were just simple animated shapes.
For smoke simulation, I used Axiom for this. I rasterized the source above. I created collision from the character alembic, and I also created some pressure from the character to push the smoke away more.
And then I moved on to setup some influence field to drive smoke movement. I created some lines following character movement.
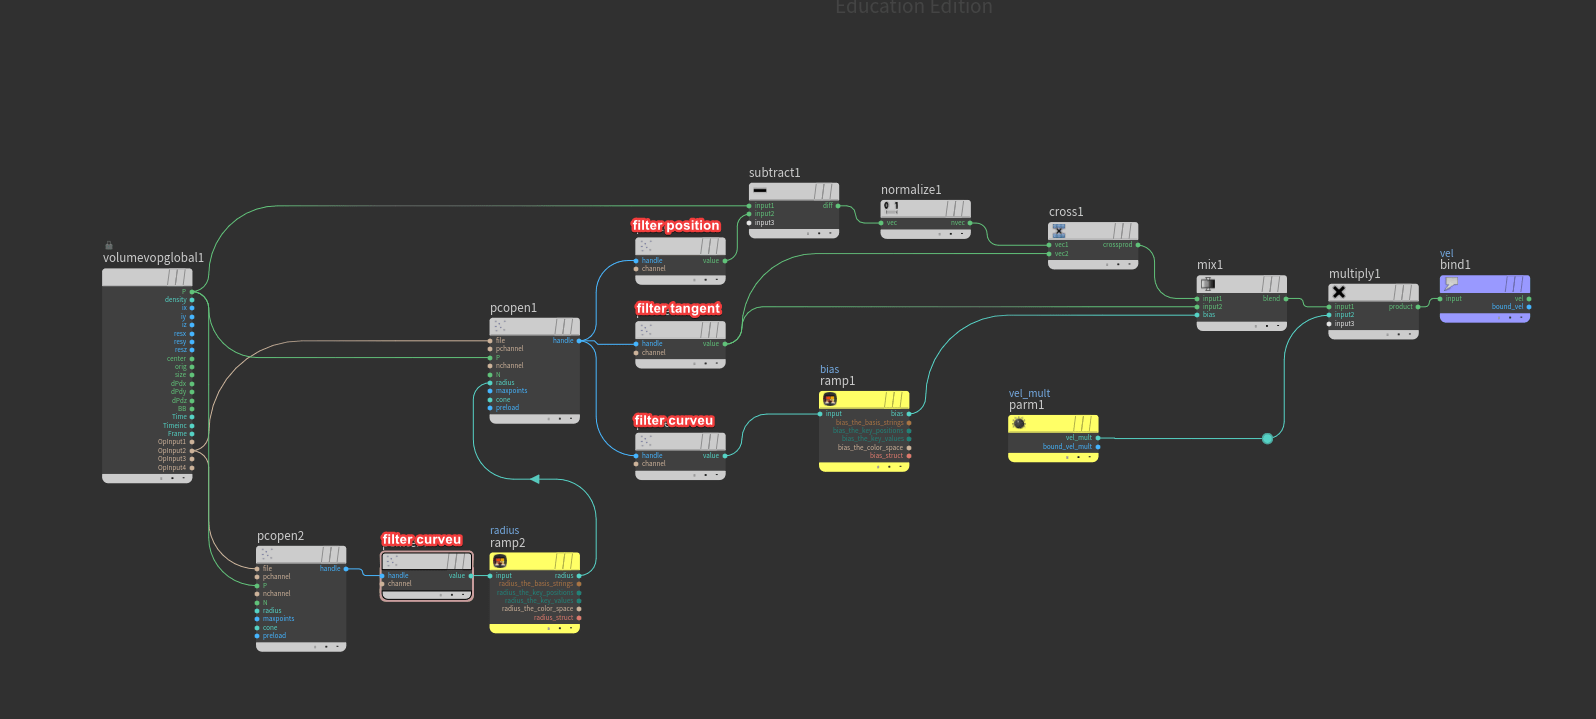
And then I made a big fog VDB field and used a volume VOP to setup some pointcloud operations. It would be easier if I just show the graph here. Basically, I wanted to mix between the cross products of those lines' tangent and relative positions to create the influence vel field for smoke simulation.
The result as below.
Smoke Simulation
All the elements for smoke simulations were ready. I changed the influence velocity to pull and changed the calculation from time step to frame step so that the smoke would follow the influence field more closely.

With some turbulence added, the smokes were done.
Particles Simulation
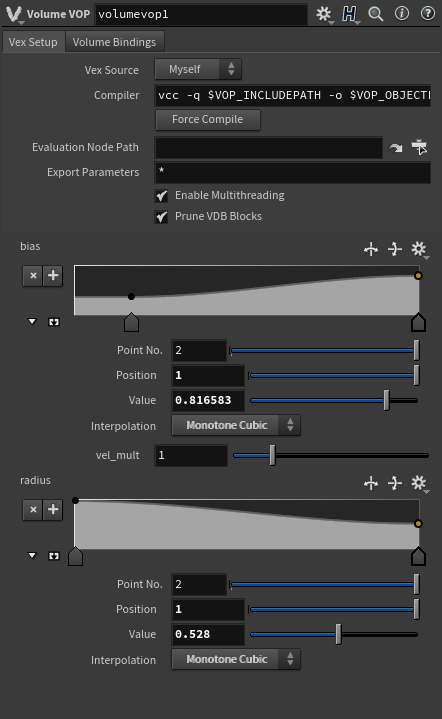
And then I used the volume to advect the particles in a POP net. I set my advection type to update position, velocity update to final velocity, and advection method to trace midpoint. And I used a popKill to delete the particles that were too slow.

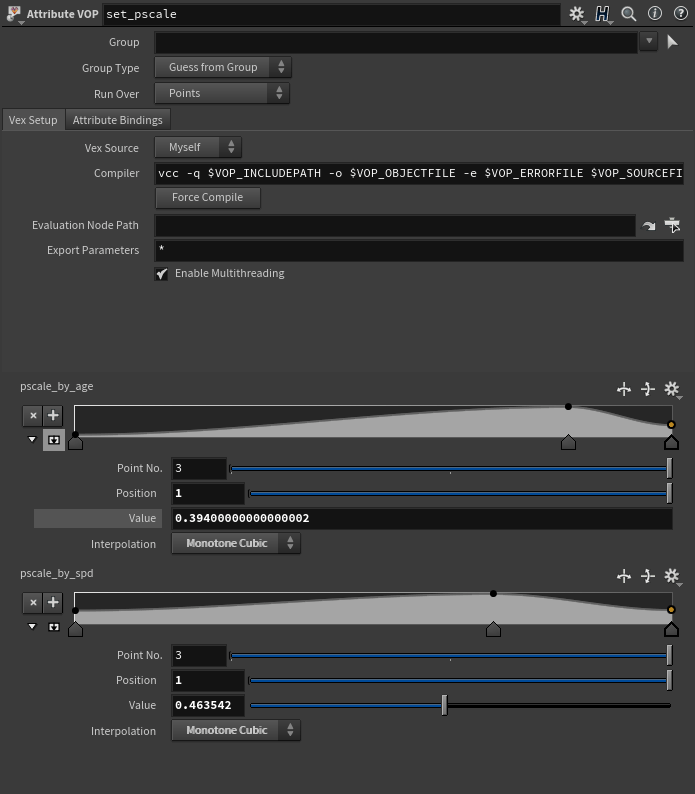
And then I multiplied fitted speed and normalized age to configure pscale. The color was mapped with similar setup.
And then it was just a matter of playing with the settings. The particles were ready to export.
Back to Unreal
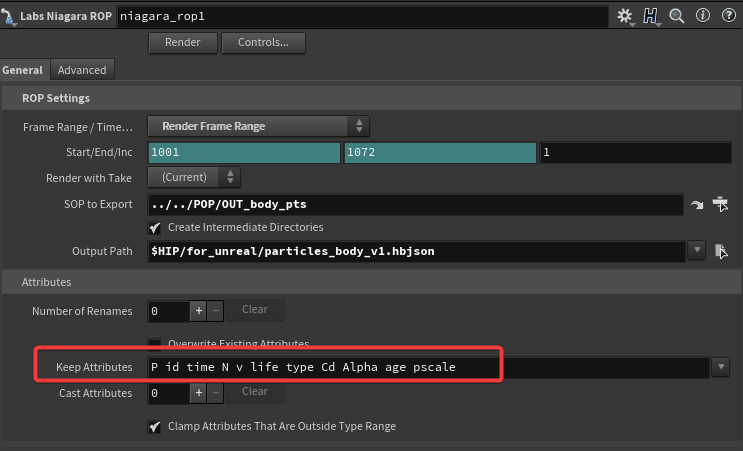
To export particles back to Unreal Engine. I used labs-niagara ROPs to write .hbjson files to disk. The point attributes can be access in Unreal Niagara too so keeping them was a must do.
First thing back was to download the correct Houdini Niagara plugin on github for the engine version that I was using. And then I installed the plug-in and went through a restart before I imported all my .hdjson files into the unreal project. And then I created Niagara system from the files.
The setup process was a little complicated so I suggest watching this video from Danny Laursen and follow along. It was from a while ago but the process still applies in Unreal 5.3.0
The material was set up to read Cd attributes from Houdini. and the particle sizes are the same as the pscale set up in Houdini, too.

Rendering
I rendered my sequence in movie render queue plug-in in Unreal Engine. I will go through my render settings because they were quite important in this case.
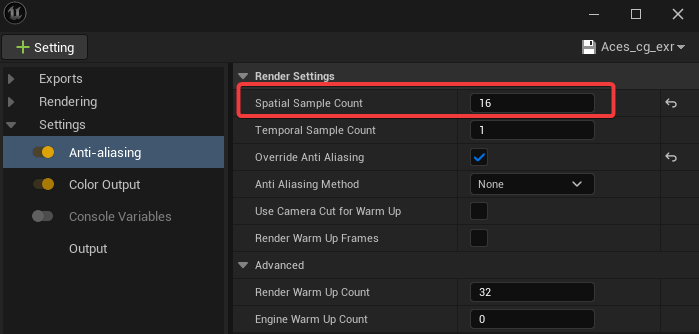
First thing is sampling. In my case, because there were millions of fast moving tiny particles, I had to turn up spatial sample instead of temporal sample count that almost everyone else was using. And I had to click override AA as well.
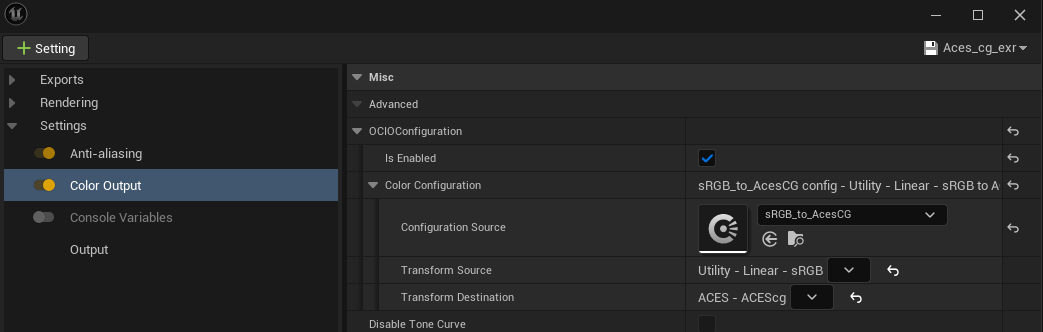
And to render in ACEScg, I created a color output override. It pointed to an OCIO config file I had in content browser, and transform my render exr to ACEScg color space.
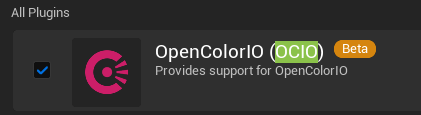
And to create this OCIO config, I had to enable this plug-in.
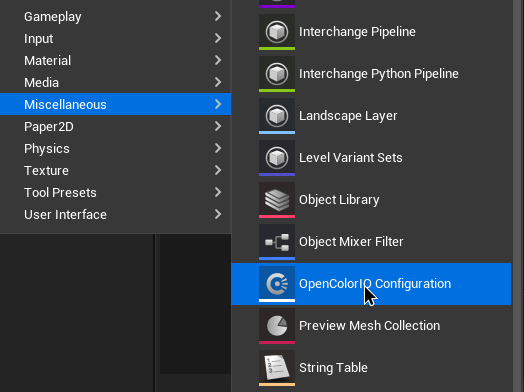
After that I can now add a config file under miscellaneous.
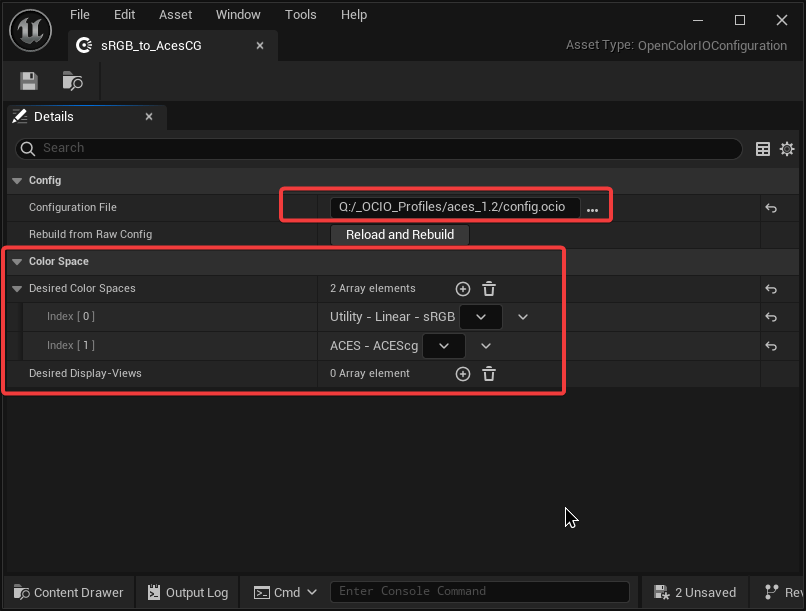
And in this config object, I located where my OCIO config file was in my drive. And I assign my desired color spaces to transform.
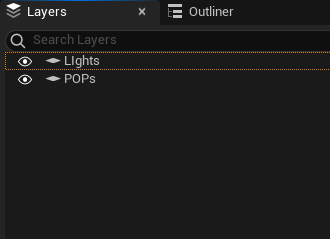
And the last thing I wanted to do was rendering stencil layers. Because cryptomatte in Lumen was not very reliable, so I wanted to try stencil layers. They are just like custom AOVs or renderVar in Houdini, but only for objects. I wanted to separate all the particles for individual grading in comp.
To render them out as AOV pass in exr, I created a deferred rendering setting and clicked accumulated alpha and my desired layers to render.
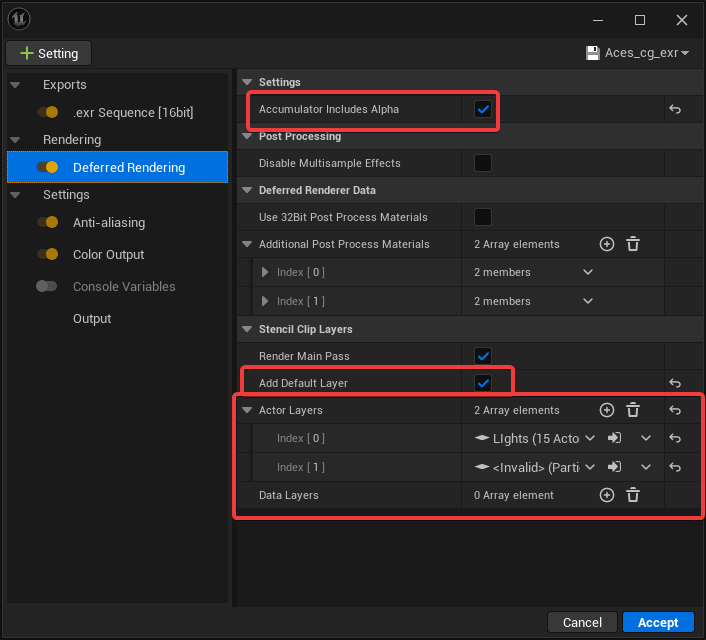
But this wasn't a setting that my vram could handle so it would just crash when I render with this setting on. I had to settle for flat render for this shot.
Compositing
The compositing was just some grading with glows and motion blur since I didn't have any AOVs to work with.
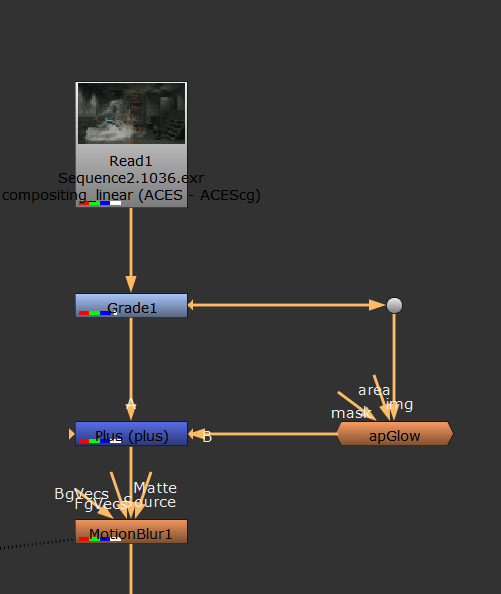
But on the other hand, rendering in Unreal with Lumen was so fast I can just go back to the scene and adjust the things I don't like and then re-render it.
Final Result
Thanks for reading the breakdown blog. If you have any question or suggestion, please let me know. And if you find this helpful or interesting, please consider checking out my other breakdown, you can find them on my profile. Cheers.